It is often difficult to spot the security issues in your App code while you focus more on adding features and offer exceptional user experience. Here is how you can take care of security bugs and protect your apps and users from being exposed to vulnerabilities. There are lot of opensource and free security scanners which you can integrate in your favourite IDEs and get rid of some common, basic security bugs easily. In this article, I will show how we can use the community edition of a popular code scanning tool- SonarQube- for finding bugs in Android app development by integrating it in Android Studio.
The SonarQube scanner is a popular code quality and security scanning tool available in multiple editions like Community, Developer, Enterprise and Data Center. You can read about it more, here.
Prerequisites:
- Java 11 or higher (Tested it using Java 11)
- Android Studio
Follow the below simple steps to download and configure SonarQube in your system.
- Visit SonarQube website download page and understand the different editions of this static code analysis tool.
- If you prefer the Community edition, download the latest version appropriate for your machine's operating system. For this article, I will be using the Windows OS version.
- Now simply unpack the zipped file to your directory of choice. We will call it the base directory for simplicity.
- Browse through the directories 'sonarqube-xy.x.xx.xx\bin\windows-x86-64' to locate StartSonar bat file. Based on your version, the path might differ.
- Add the location to your system path variable.
- Now simply run the bat file from command-prompt.
- If everything goes well, you will see that execution is completed. Keep the CMD running.
- Now open http://127.0.0.1:9000 in your browser to get the tool UI.
- Login with default credentials (admin/admin)
- The tool installation is complete.
classpath "org.sonarsource.scanner.gradle:sonarqube-gradle-plugin:2.6.2"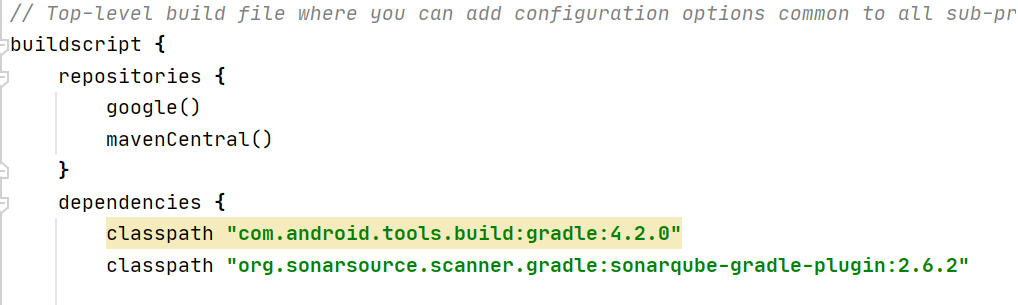
apply plugin: 'org.sonarqube'

sonarqube
        {
            properties
                    {
                        property "sonar.projectName", "developerlibs"
                        property "sonar.projectKey", "com.devlibs.android"
                        property "sonar.language", "kotlin"
                        property "sonar.sources", "src/main/java/"
                        property "sonar.binaries", "build"
                        property "sonar.sourceEncoding", "UTF-8"
                        property "sonar.login", "admin"
                        property "sonar.password", "admin"
                    }
        }

You are all set to go, Just refresh your SonarQube homepage opened at http://127.0.0.1:9000 and you can see scan results appearing in your dashboard. Simple, right?