Thursday 7 June 2018

How to add a router image in GNS3

If you want to add a router to a network in gns3 you should have a router image added to it.
By default gns3 wouldnt have any router images in it. One should manually download and add the images to gns3.

In this tutorial I will show you how to add router image to GNS3

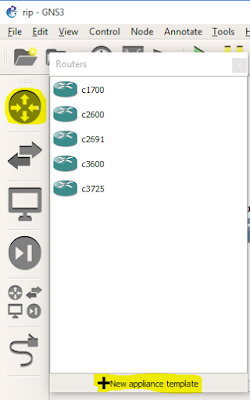
Click on the  button for browsing routers (highlighted in the screenshot)-->Then click on New appliance template

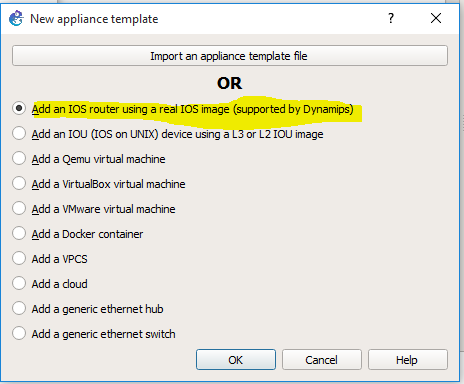
Then select "Add an ios router using the real ios Image option as shown below
Then select new image button 
Use browse option to select the path where ios image exists
Once the ios image is selected you will get a popup asking whether to decompress it or not .Select 'Yes'
Then click on next it will ask you for the name and platform  for this ios image
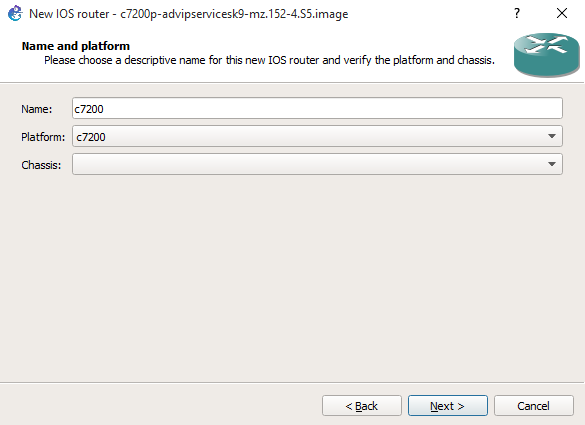
Then you can click on next until it is finished. There will be so many options for which you can configure it, but it is much better to keep them as like it
Once it is configured you will get a screen the new ios image is shown along with other installed router templates as shown below.

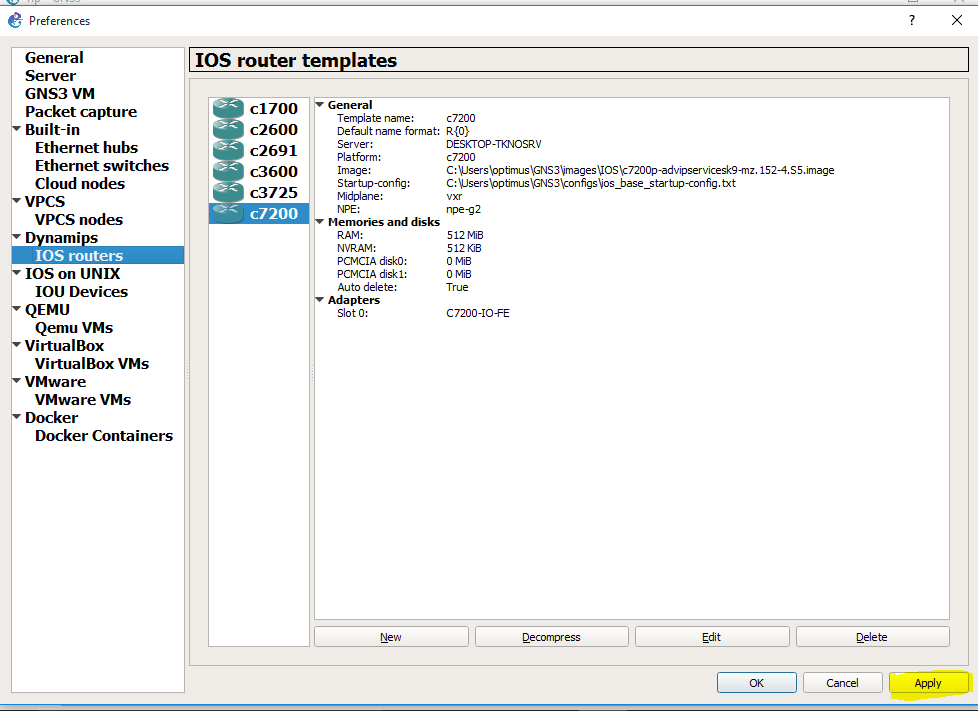
Then you can use the configured router from the  router option


Saturday 12 May 2018

Training CTF 2018 : Part 2


This is my CTF Writeup Part 2. Please see Part 1 here.

I moved to SQL Injection and decided to attempt SQL injection and get access to the web application database. The page displayed an option to enter User ID and get details of the user.


My first input was 1 and it displayed first name and surname of the logged in user account.


Check for any SQL error by giving some invalid value or characters. This way, we can try to manipulate the SQL query processing. The input was 1’ here.


In order to find out the number of columns in database table where user details are stored, I gave the following query as input.


In the above query, UNION is used to join a forged query to the original query. The - - or # is used to comment out the rest of the things following the forged query. But when I tried the same query by adding one more column (1, 2, 3), the database responded with the below error, clearly indicating that there are only two columns.


Then I tried to find out the database details by modifying the query to fetch database version.


When the query was updated with database () command, it issued the database name – dvwa.


To get the table details, the following query was issued and I got all the table names. The interesting one here was table secret. 


Column details were fetched from the table ‘secret’ and I got a secret data ‘ Superkings’. Here I am, this one was another flag.

Training CTF 2018 : Part 1

This was a virtual machine shared with me. The objective was to get the final flag.

The first thing I did after getting the vulnerable system was to connect it to my network and set the network adapter mode to ‘Bridged’. Then I opened my Kali Linux in Bridged mode and checked my IP address.


I did a basic network scan using NMAP and found out the IP address of target system.
nmap 192.168.0.0/24

I got my target system IP as 192.168.0.108
After a detailed NMAP fingerprint scan, I got a list of all the services running on my target system. I could see http service running on target and decided to try for a web page. On hitting IP address on my browser, I got the web application page running on target system.


I did a few SQL injection attempts to break the application login mechanism, but nothing worked. The webserver responded each time with ‘Login failed’ error. Remembering my past experiences with CTFs, I decided to inspect the elements. I could not see anything interesting there. 


Then I noticed the link below the login form.


I just clicked the link and a new page opened. It was just a 404 error page but the URL displayed on browser got my attention.


Then I replaced the ‘localhost’ with actual target IP address and to my surprise, another page opened. On a close inspection, I found a hidden login credential from the new page.


It read ‘login details; username:xxxxx password:yyyyy
So, this was the first discovery to login to the web application running on the target system. I was able to login to the system successfully with above credentials.


Monday 7 May 2018

Tutorial For Data types in Python (HackerRank Problem )

I was considering myself as a master in Python until I came across a scripting competition which tested my knowledge. While I was going through the trial questions I was damn confident I could finish it with in minutes. Yes I was so good at coding I thought so while solving the trail questions.

I could proudly say that I have completed the trial questions within a matter of minutes. Everything was fine until i tried the last question of competition . Which I have lost all my confidence in me.

After trying the last Question I felt like I should start from the scratch and try to do so many questions

I found HackerRank an ideal platform to check my level. I thought I will publish my solution for different problems in my Blog also.

1.Program to add / combine Local variables with the input

#Program to read an integer, float and string as input and combine with local variables and then print them

#Local Variables
fir_int = 5
fir_doub = 1.0
fir_str = 'This is the First String  and '

#Declaration of Local Variables of different types(integer, double, and String )

print('Enter an integer,floating Point number and a string')
#Read the inputs for each type
sec_int=int(input()) # Type Conversion to  int is needed as by default the input will be a String so we need to convert it into desired input type
sec_doub=float(input())
sec_str=input()

print('The sum of first and second values are')

# Print the sum of integer, float and double values (local variable value + input).
print(fir_int+sec_int)

print(fir_doub+sec_doub)

print(fir_str+sec_str)

Output